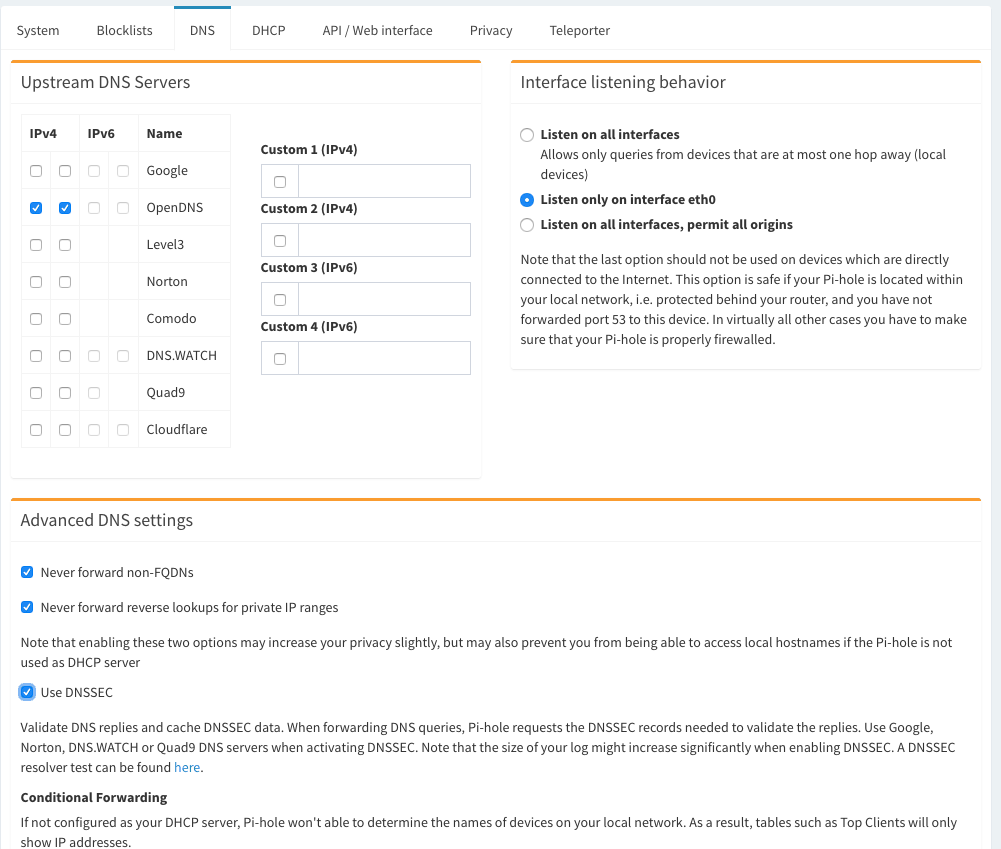
1. Install a supported operating system
You can run Pi-hole in a container, or deploy it directly to a supported operating system via our automated installer.

2. Install Pi-hole
Our intelligent, automated installer asks you a few questions and then sets everything up for you. Once complete, move onto step 3.

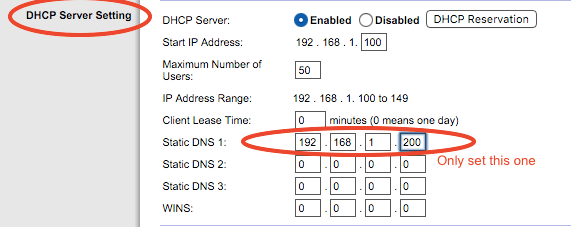
3. Use Pi-hole as your DNS server
Configure your router’s DHCP options to force clients to use Pi-hole as their DNS server, or manually configure each device to use the Pi-hole as their DNS server.
4. Block ads everywhere, even on the go
By pairing your Pi-hole with a VPN, you can have ad blocking on your cellular devices, helping with limited bandwidth data plans.

The Pi-hole Team
The Pi-hole Developers are spread across the globe and work on the project in their spare time. We are a 100% remote-work team.

Dan Schaper
Co-Founder
Core Developer

Adam Warner
Docker Maintainer
Core Developer

Dominik Derigs
FTL Designer
Core Developer
Web Interface
In addition to blocking advertisements, Pi-hole has an informative Web interface that shows stats on all the domains being queried on your network.

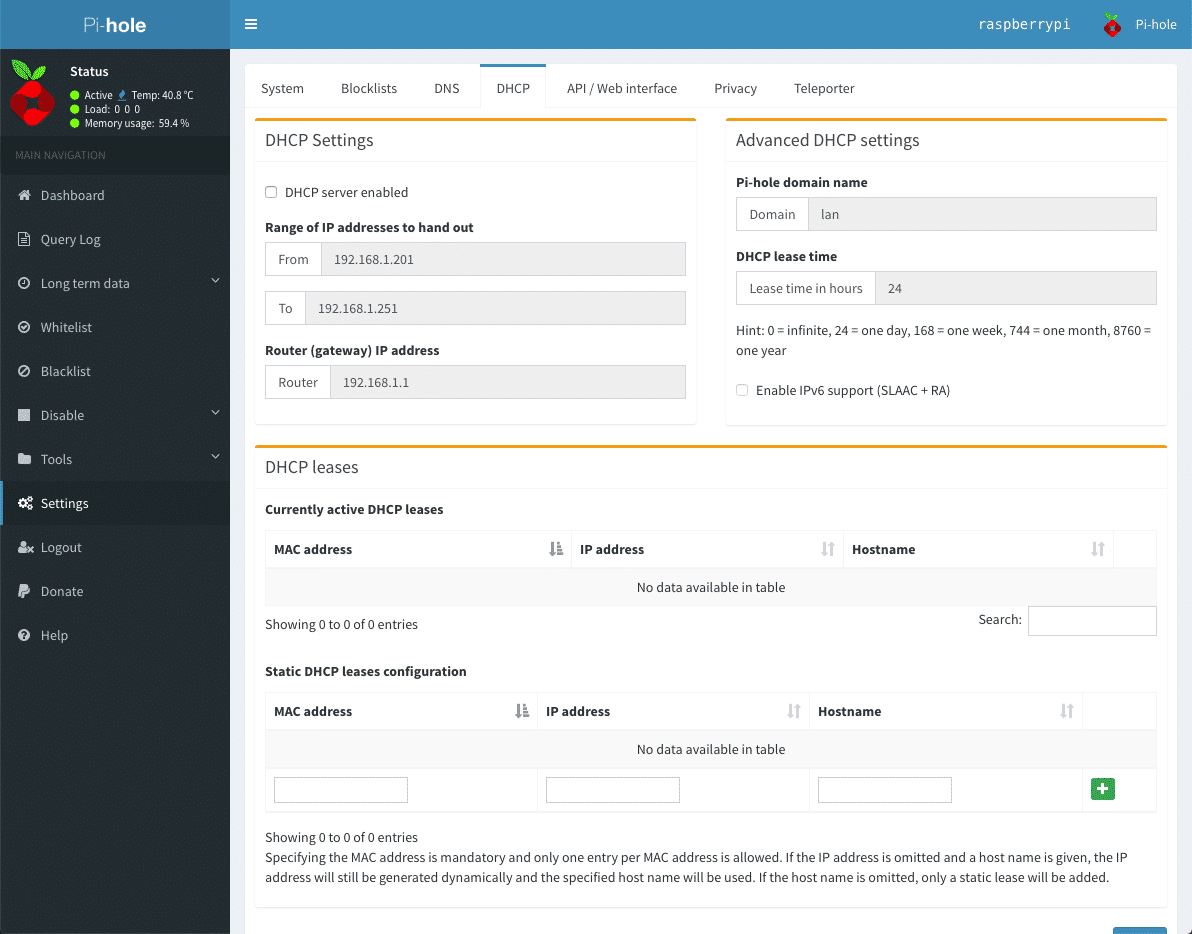
Built-in DHCP Server
Pi-hole works fine with an existing DHCP server, but you can use Pi-hole’s to keep your network management in one place.
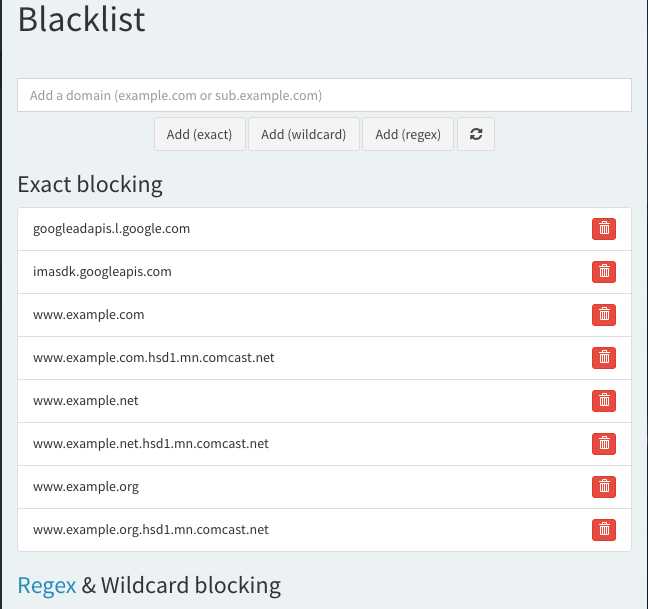
Manage White And Black Lists
Fine-tune your experience by blacklisting or whitelisting domains. Extend this capability with powerful regex statements.
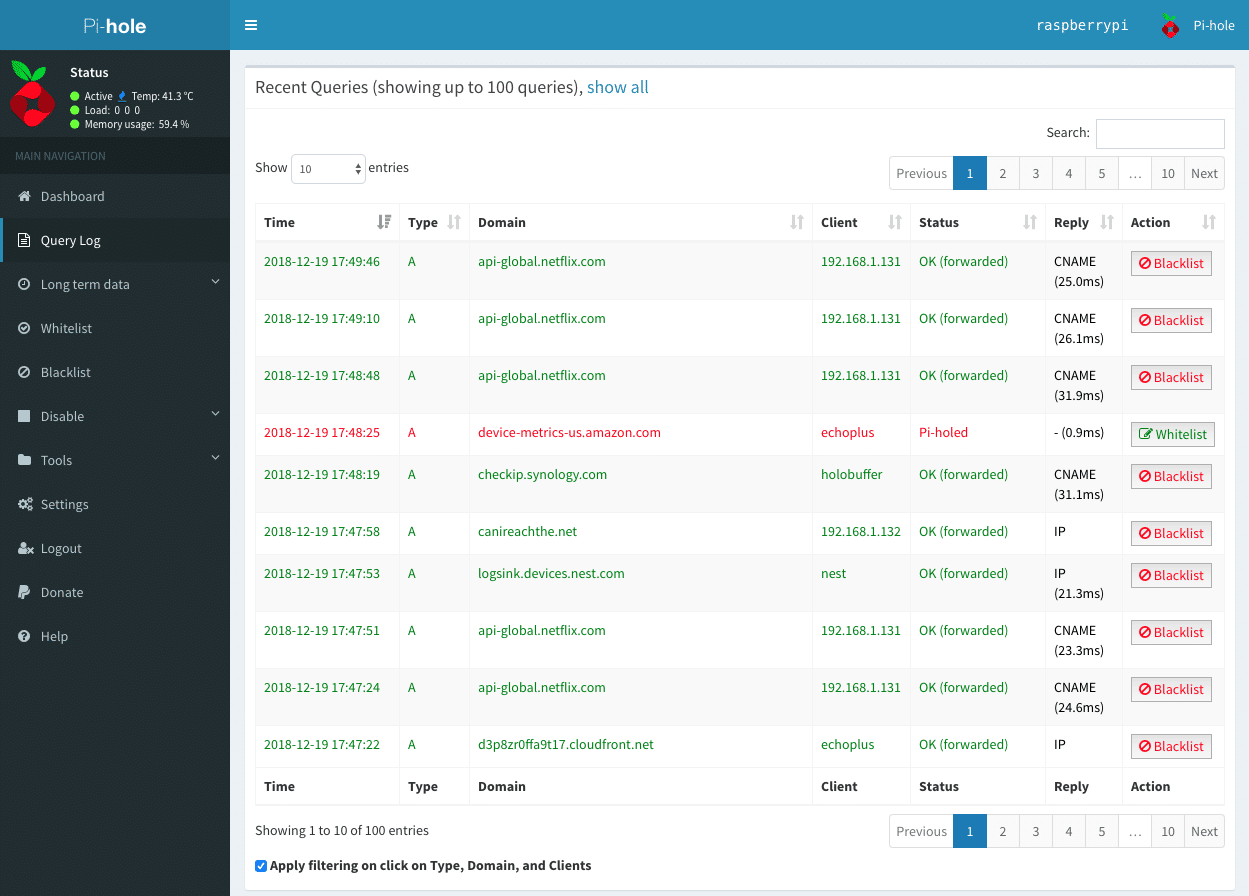
Query Log
See all the domains being queried on your network, where they originated, and more.
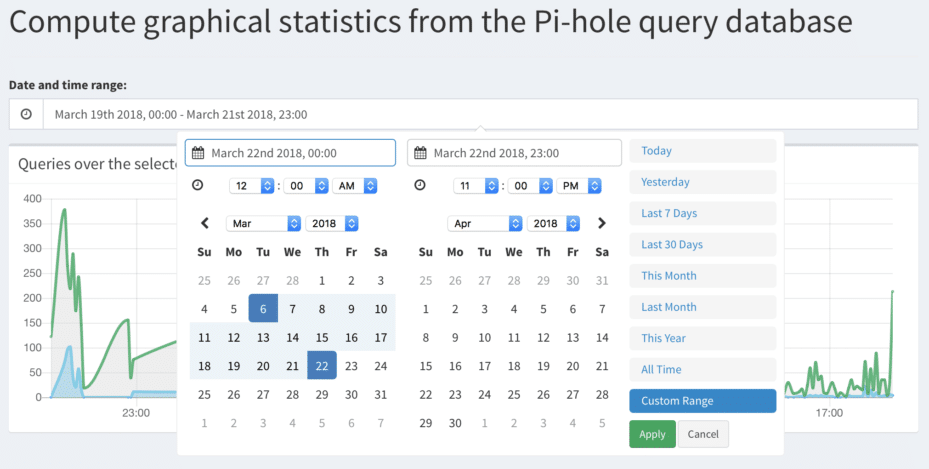
Long Term Statistics
Queries are stored in a database and can be queried at any time. Learn about what’s happening on your network over time.
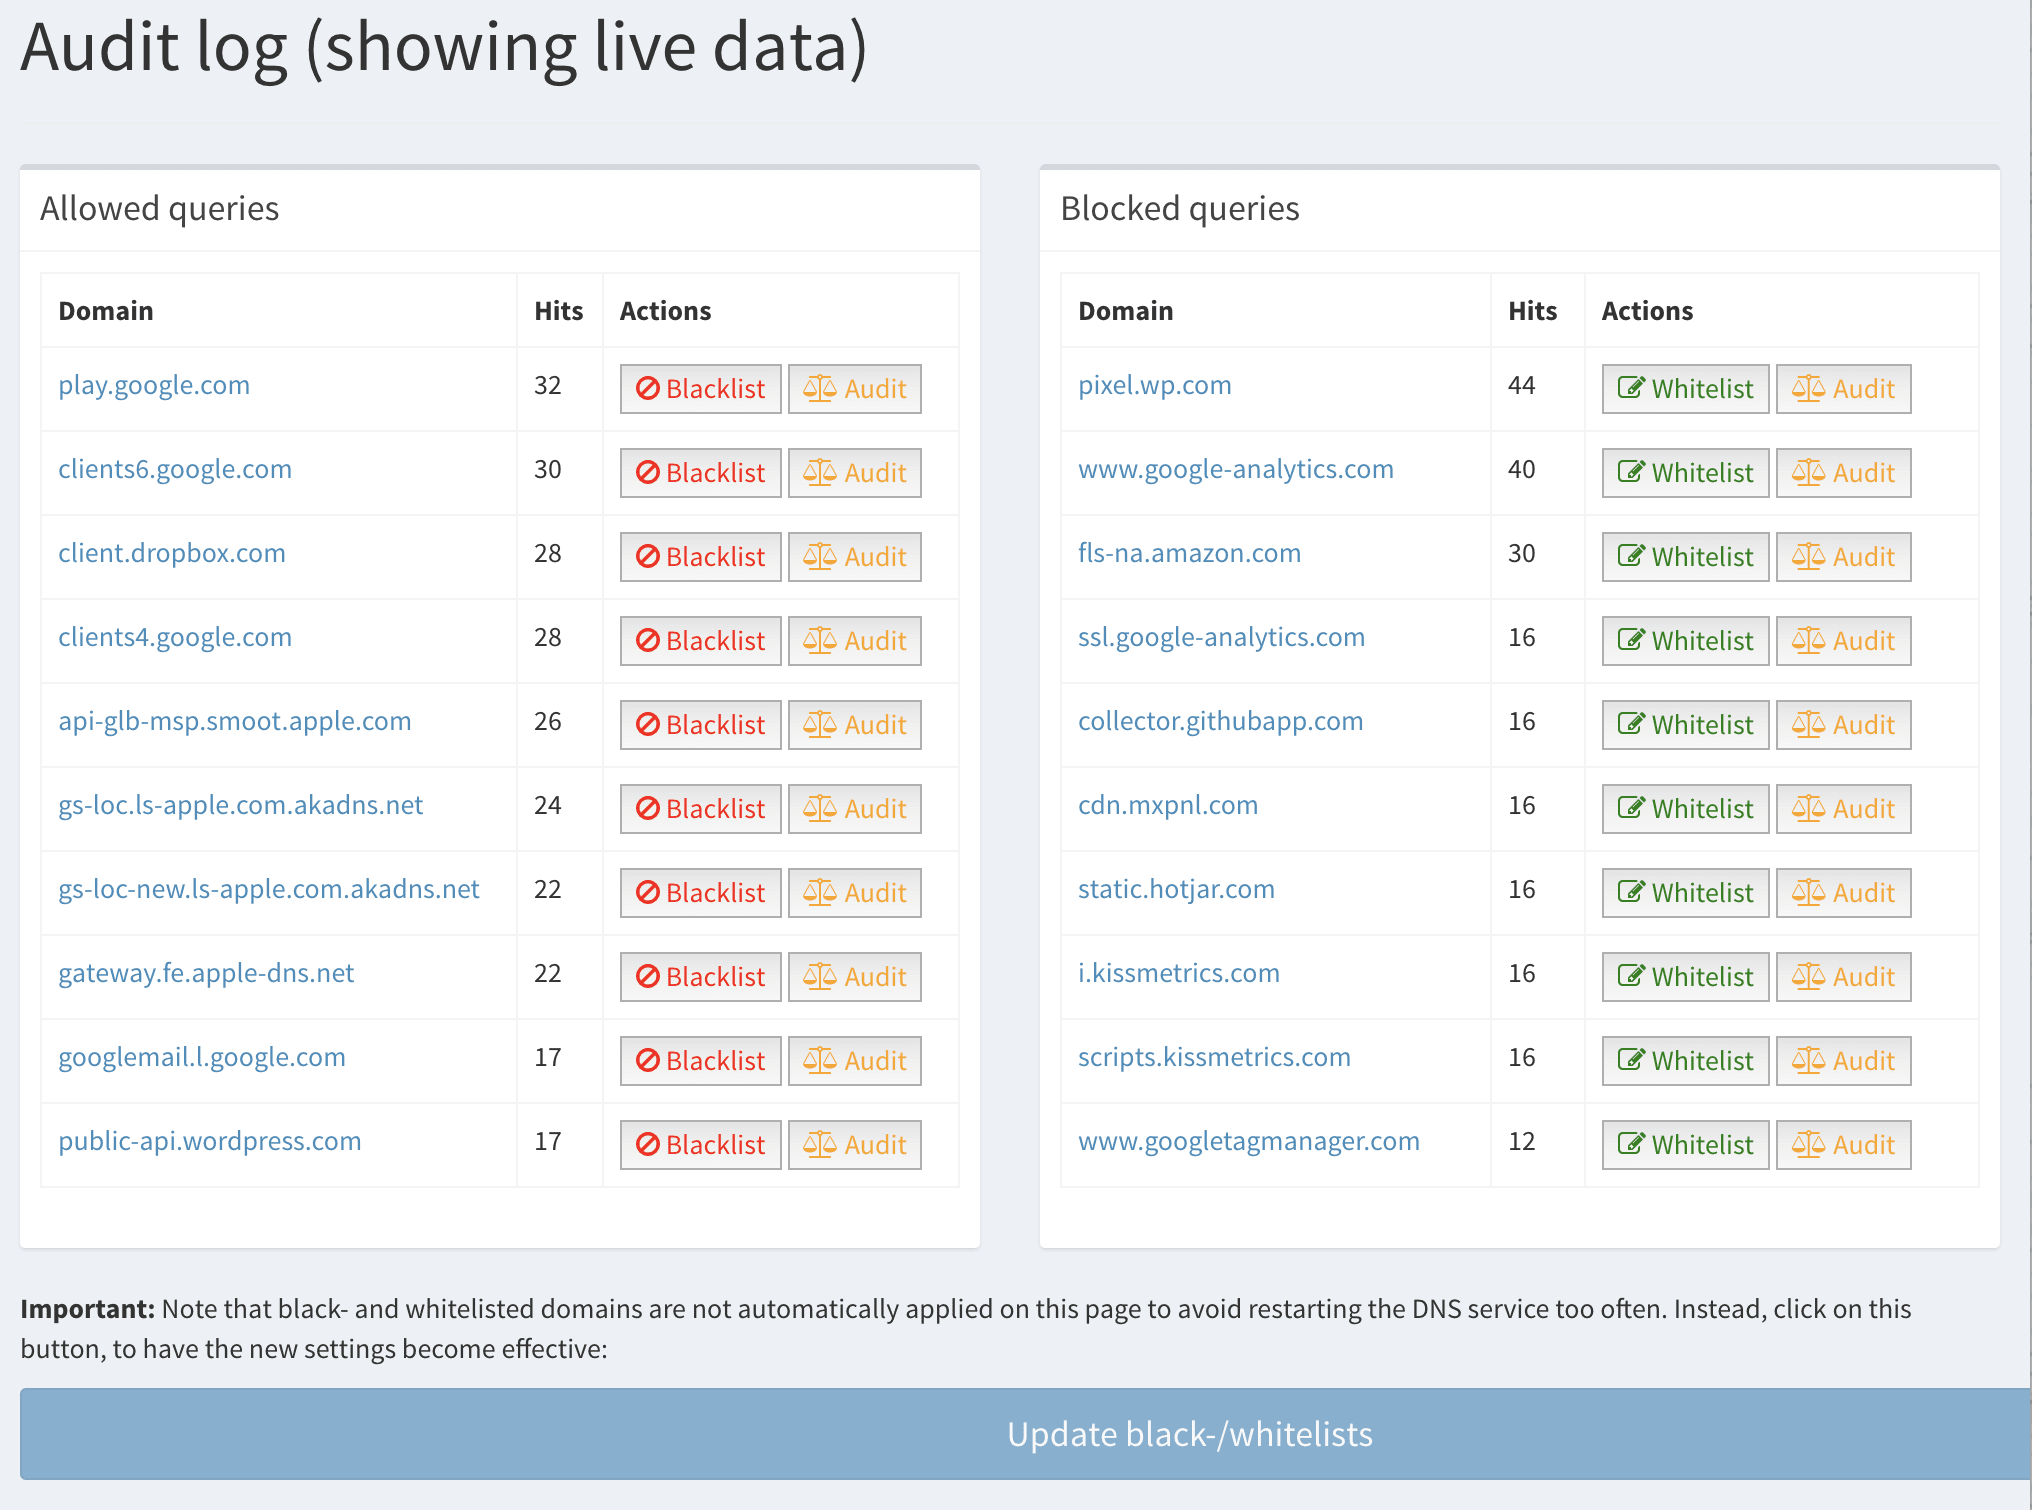
Audit Log
Keep track of the most queried domains and add them to a white or blacklist from a central page.
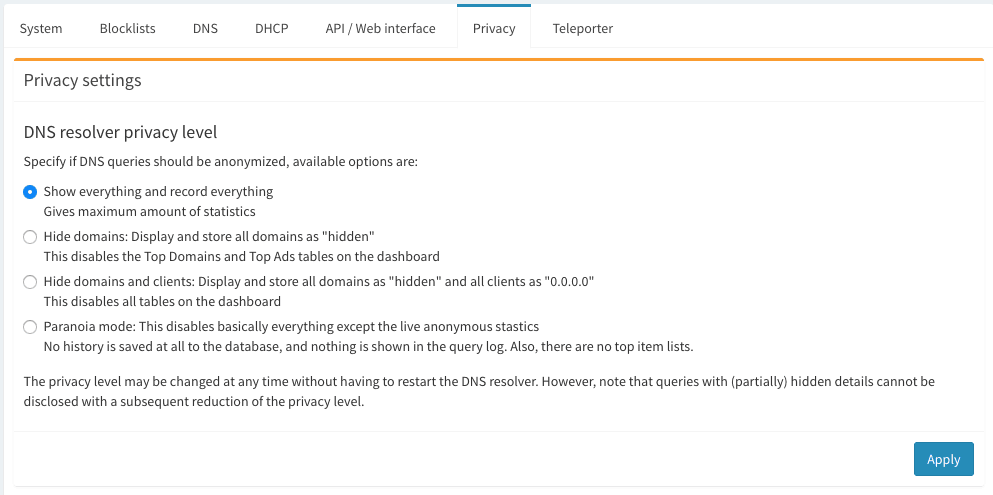
Privacy Modes
Choose from four different privacy modes that works for your environment.
Other Settings
Control and configure other settings from the Web interface.
