Pi-hole and OPNsense

Using OPNsense DHCP with Pi-hole network ad-blocking
NOTE: This guide is likely outdated and based on an older OPNsense version. The ideas and concepts may still work but the actual implementation may/will not.
One of the lesser known features of Pi-hole is the ability to see MAC and IP addresses from external servers.
This feature was added in FTL version 5.3 and lets you set up external services that can send EDNS0 Client Subnet information with queries.
We’ll look at how this works with the popular firewall application OPNsense. We will use the OPNsense DHCP server, dnsmasq service and an optional Unbound server for Pi-hole upstream DNS resolution. When we are finished the network clients will be served by the OPNSense DHCP service and will see OPNSense as the sole DNS server. You won’t have to set each client to use Pi-hole directly, and your network hostnames can be resolved without needing Conditional Forwarding.
Configuring OPNsense dnsmasq
The first step in the process is to set up dnsmasq on the OPNsense host to send the extra information for Pi-hole to utilize. This involves access to the hosts command line. I use SSH with key based authentication. Setting up SSH access is beyond the scope of this guide but there are a number of guides that can help you with this process.
Once you have access you will need to add an advanced settings file. https://docs.opnsense.org/manual/dnsmasq.html#advanced-settings I have chosen to use edns0.conf as the filename in the /usr/local/etc/dnsmasq.conf.d directory. We will tell dnsmasq to send the MAC address along with the full IP address of the client:
/usr/local/etc/dnsmasq.conf.d/edns0.conf
add-macadd-subnet=32,128
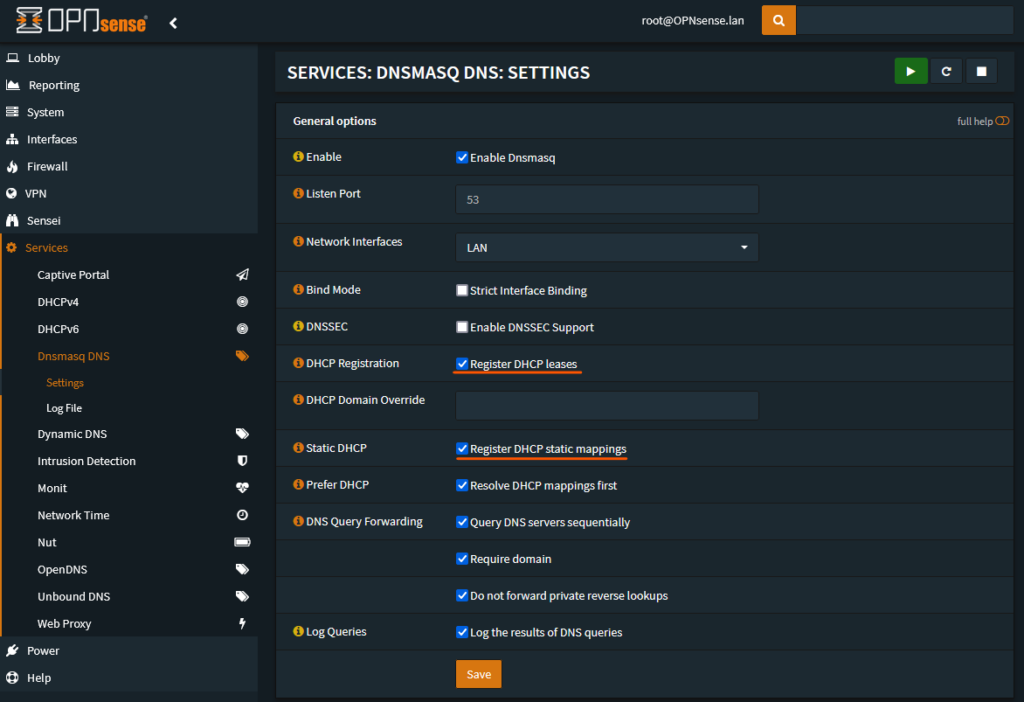
Next we will set dnsmasq to resolve the DHCP client hostnames. This step replaces Conditional Forwarding since dnsmasq will be the main resolver and will use the local information for client hostnames. The important configuration is to enable “Register DHCP leases“. If you use additional static lease mappings then you will want to also enable “Register DHCP static mappings“.
Configuring OPNsense DHCP
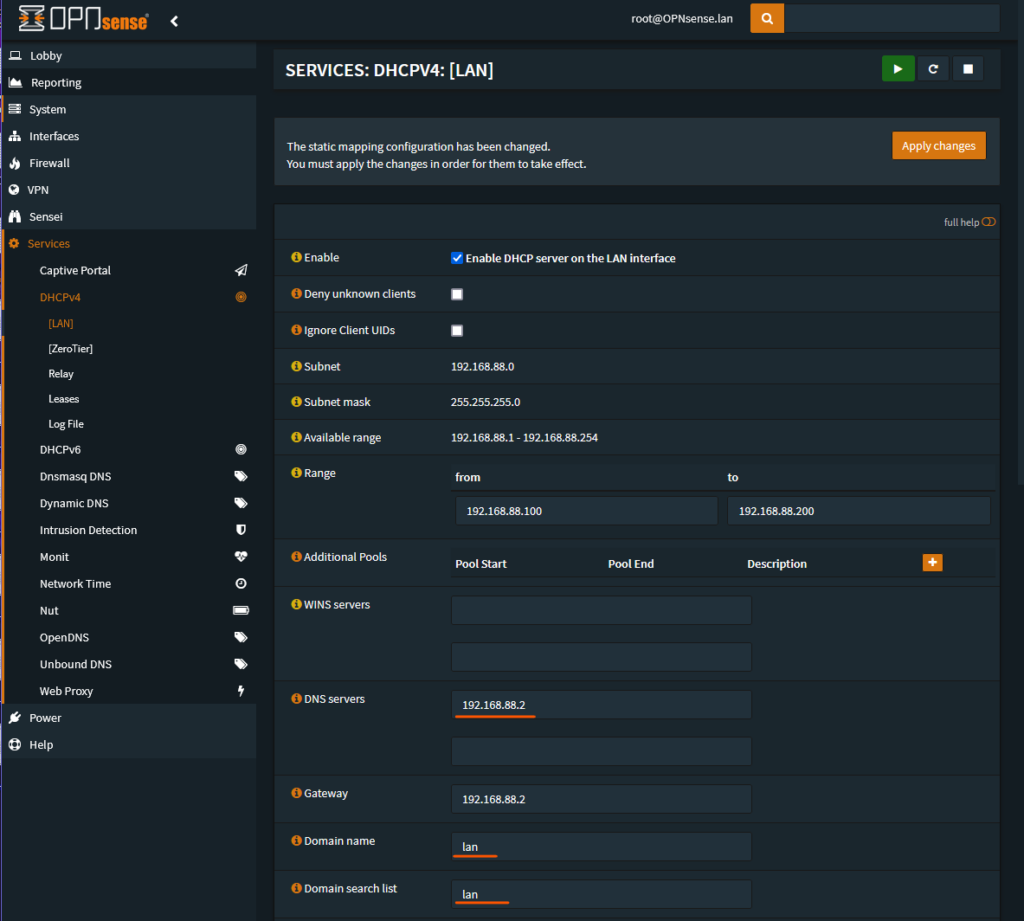
This next step configures OPNsense to send it’s own IP address as the DNS server for client DHCP leases. This uses the dnsmasq that we configured in the previous step. The example OPNsense router’s IP address is 192.168.88.2. Set this value in “DNS Servers”. If you use a local domain name then you would add that to “Domain name” and “Domain search list”.
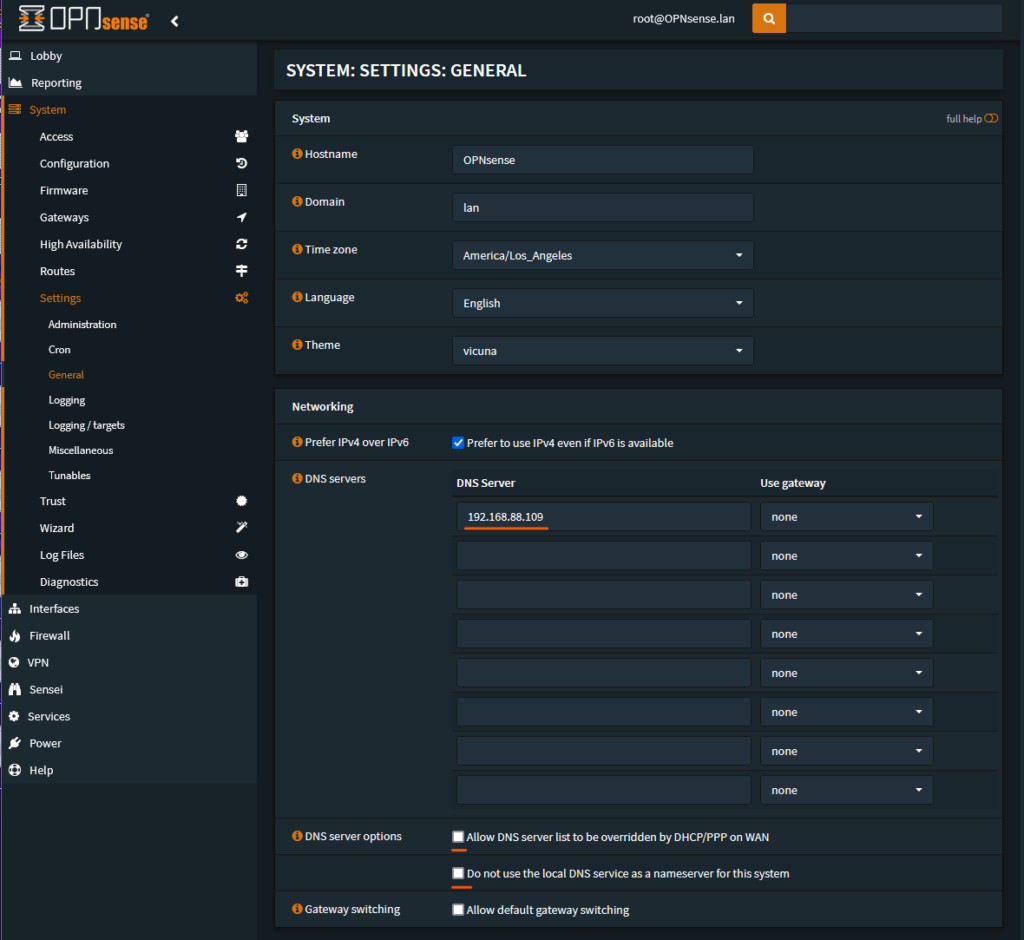
Next we configure the DNS server that OPNsense will use as it’s resolver. This will be the Pi-hole server. The example IP is 192.168.88.109. We enter that under “Networking > DNS servers”. Be sure that this is only Pi-hole, any other DNS server would be used and that would allow bypassing of the blocking features.
In the same section be sure to uncheck “Allow DNS server to be overridden” and “Do not use the local DNS service“. OPNsense’s built in help will explain their functions.
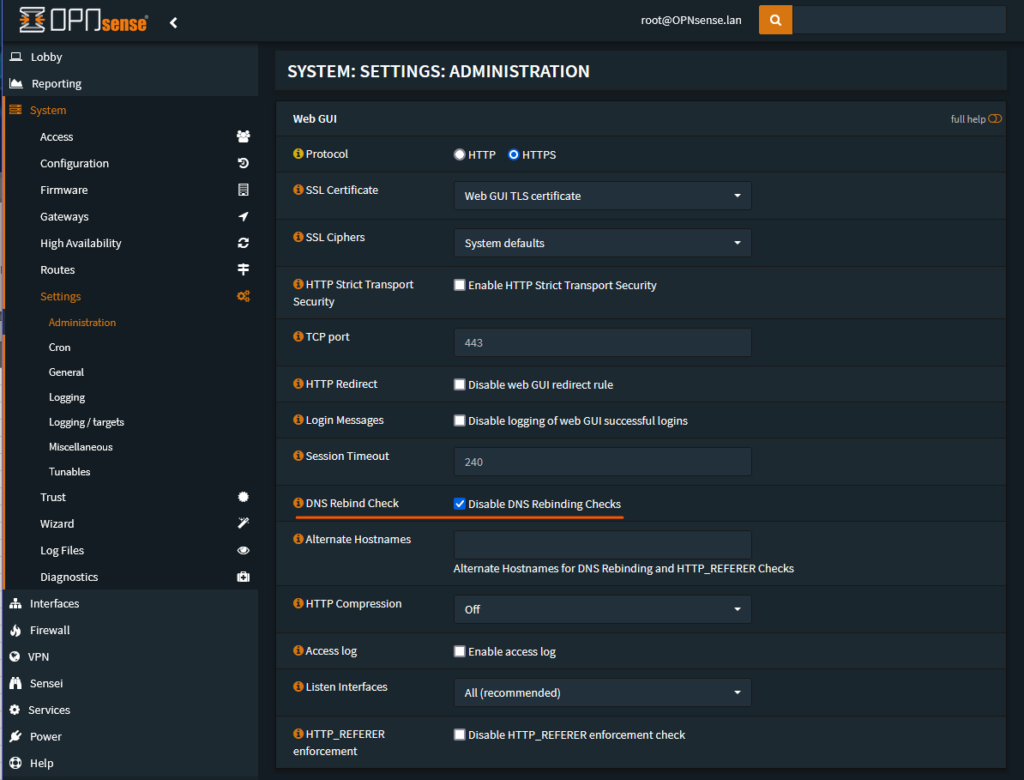
The last bit of housekeeping involves disabling “DNS Rebind Checking”. Rebind protection is normally a good thing to have but this will drop any DNS query responses that include private space IP addresses. Pi-hole works by returning either a local IP address or 0.0.0.0 by default and this would trigger rebind protection. Clients would not get the Pi-hole responses and your logs would show that rebind was triggered and responses dropped.
Configuring Pi-hole
Most of the work is done by OPNsense so there is not much to configure on Pi-hole. Once clients have the new lease information they should start to show on Pi-hole without any additional changes. You should see the number of clients increase.

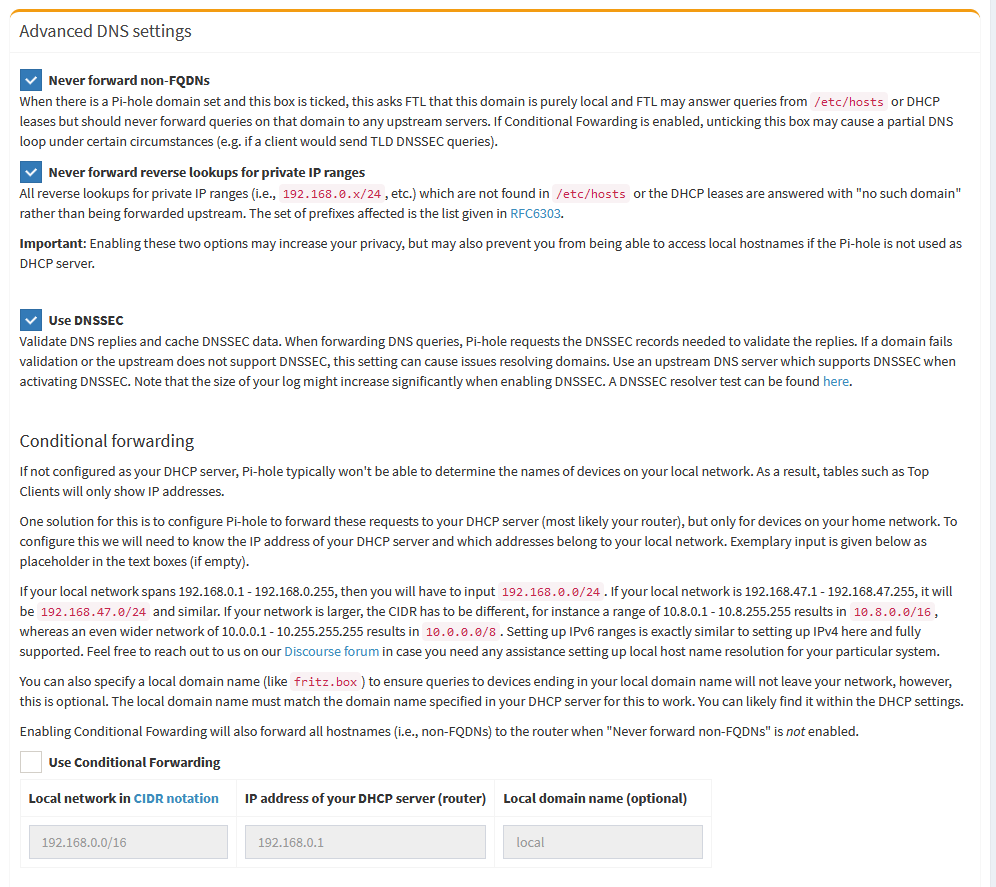
We no longer need to use Conditional Forwarding so we can enable some of the leak protection features of Pi-hole. We don’t want to forward Non-FQDNs, those are our LAN client names and will be resolved by OPNsense before those queries are sent to Pi-hole. Same for Reverse Lookups.
You can optionally enable DNSSEC to see the status of queries on the Pi-hole Query Log.
With all of these settings enabled you should have a robust DNS and DHCP configuration. Please join us at https://discourse.pi-hole.net for discussion. Next blog post will show how to enable Unbound on the OPNsense router to use as Pi-hole’s upstream DNS server. Thanks for reading!